How to write a VNF Manager
This section is going to describe how to write your own VNF Manager by using the vnfm-sdk. Moreover, the vnfm-sdk contains all the things you may need for the development of the VNFManager of your choice as well.
The vnfm-sdk provides the following things:
- multiple vnfm-sdks where you can choose your preferred type of communication
- Catalogue, shared with the NFVO containing all entities
- VNFMHelper for providing some methods out of the box
Requirements
Before you can start with developing your own VNFManager you need to prepare your programming environment by installing/configuring the following requirements:
- JDK 8 (installation)
- Gradle 1.12 or above (installation)
Develop your own VNFManager
This part is going to describe the steps you need to do to develop your own VNFManager with the help of any vnfm-sdk.
The practical parts of implementing a basic VNFManager will focus on the usage of a specific vnfm-sdk, namely the vnfm-sdk-amqp.
Preparations
This section describes the initial steps for creating the project structure and configuring essential files for developing your own VNFManager. This can be done in two ways. Either you may use your favorite IDE or you may do everything manually via the command line.
Once this is done, you can start implementing your VNFManager by using different communication models, the catalogue and several helpers.
Using your favorite IDE
In the following we will create the project and setup the configuration files by using your favorite IDE. So first of all, start your IDE and go to the next step. All the details base on the usage of IntelliJIdea.
Create a new project
Once you have started the IDE, click on File -> New -> Project...
In this dialog click on Gradle on the left and select java in the main properties window in the middle.
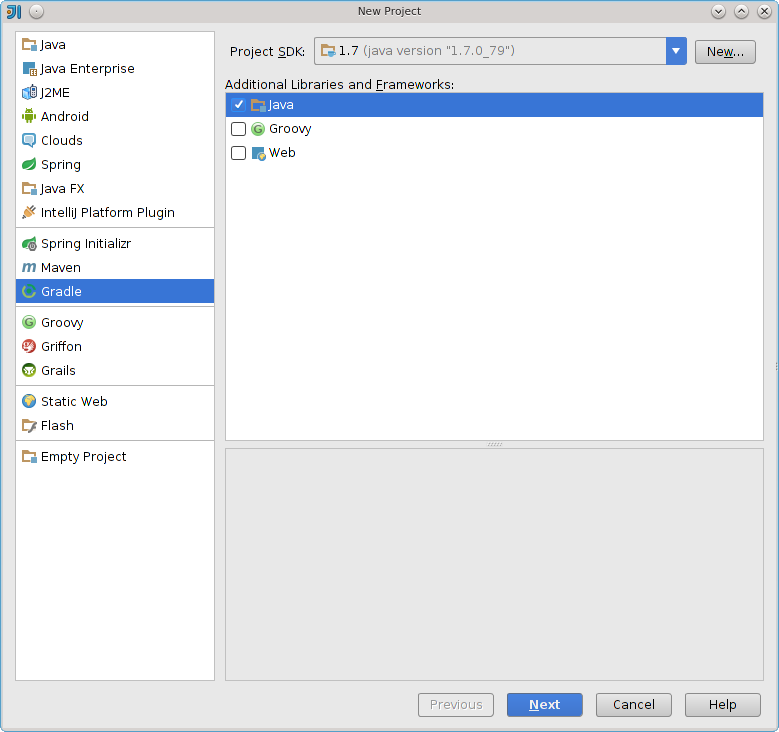
Then click on next to go to the next window.
In the next dialog you need to define the GroupId, ArtifactId and the Version. More information on the specific meaning can be found here.
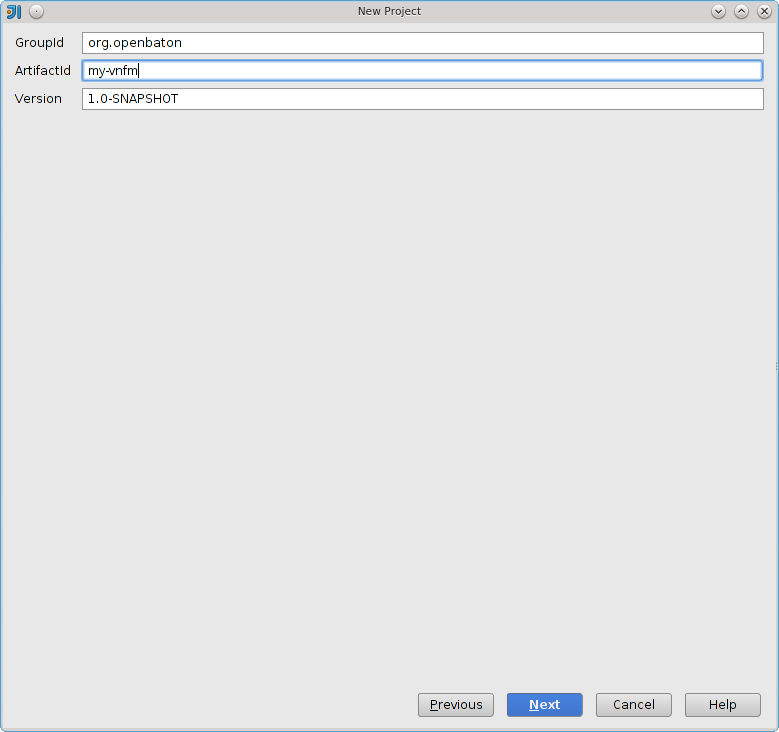
Continue with the next dialog.
In this dialog you need to specify which gradle you want to use. It is recommend to use the default gradle wrapper. Additionally you can enable the auto-import.
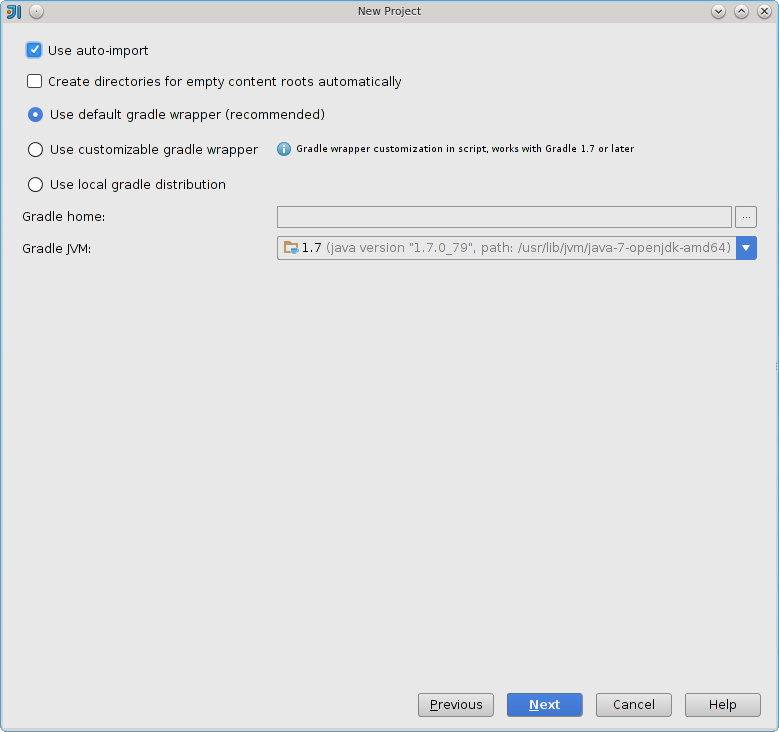
Continue with the next dialog by clicking on Next.
In the last dialog, you need to define the project name and the project location.
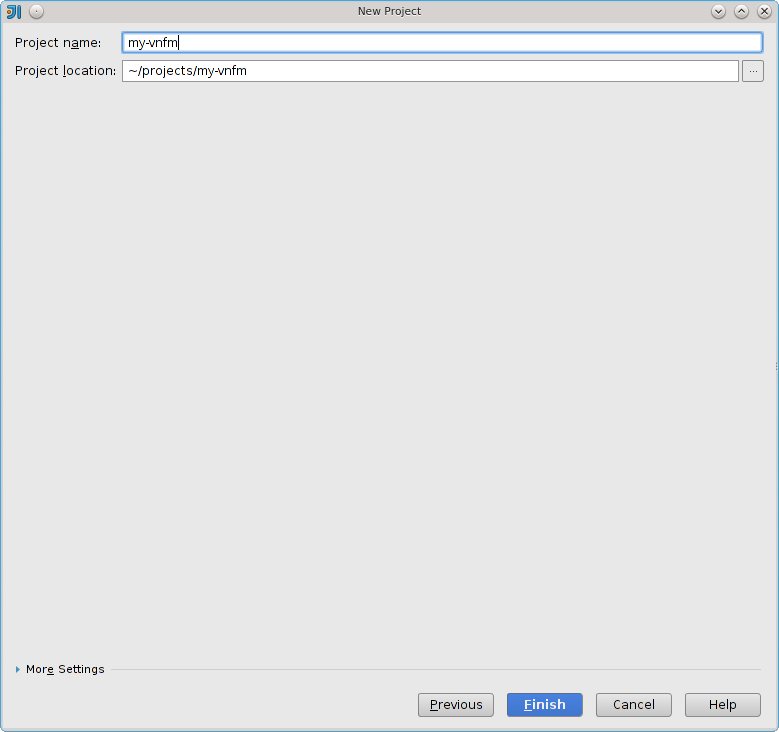
Once this is done you can click on Finish and continue with creating the Main Class.
Create the Main Class
Afterwards, you need to create the Main Class of the VNFManager which will be started in the end. For doing so, right click on the root folder my-vnfm, then click on New -> Directory and insert what is show below.
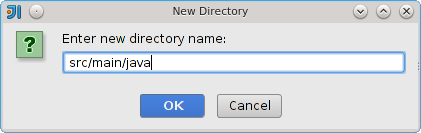
Click on OK to continue.
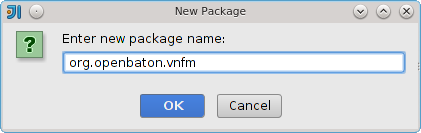
Additionally you need to create a new package. This is done by a right-click on the previously created directory java. Click on New -> Package. Here you can define the package name.
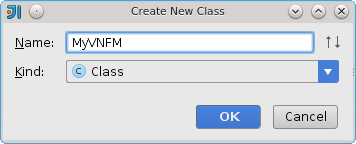
Finally you can create your Main Class by clicking (right click) on the previously created package and click on New -> Java Class.
Once you did all these steps, the initial project structure is created. What we miss right now is the configuration of the gradle files to define and fetch dependencies we need for implementing the VNFManager. This is described in later sections.
Create the properties files
The properties files are used to define several parameters you need at runtime. So just create the following file structure.
Do a right-click on the main folder located in the src folder. Click on New -> Directory and create a new folder with the name resources.
Do again a right-click on the newly created folder resources and click on New -> File. This you need to do two times. The first file is called application.properties and the second one is called conf.properties.
What these files should contain is explained here.
Using the command line
This section refers to the developers which don't like to use any IDE. By not using any IDE we need to create all the folders and configuration files manually. So we start with creating the project structure, the Main Class, initializing the gradle wrapper and according configuration files.
Create project folder
First of all you need to create a new directory for your VNFManager. Here we call the new VNFManager my-vnfm. So this can be replaced by whatever you want.
$ mkdir my-vnfm
Create the Main Class
The Main class is the most important class you need to consider. Here you implement your main method and also methods you need to have for your VNFManager. Further explanations are done in the according sections. This is only for creating a proper file structure. So execute the following commands to create the Main class in a proper folder and package structure.
First, you need to create the folders and package by executing the following command in your root folder of the project.
$ mkdir -p src/main/java/org/openbaton/vnfm
This creates the java folder src/main/java with the proposed package name org.openbaton.vnfm.
In the next step you create the Main Class called MyVNFM in this case.
$ vim src/main/java/org/openbaton/vnfm/MyVNFM.java
At this point you create only the basic Java Class used later as the Main Class for implementing your VNFManager. The newly created Java Class should contain the following lines for now.
package org.openbaton.vnfm;

public class MyVNFM {
}
If you have chosen a different package name you need to replace it as well at this point. Once this is done, you need to initialize the gradle wrapper and configuring according files.
The Build.Gradle file
First you need to create the build.gradle file by executing the following command from your root project folder.
$ vim build.gradle
This gradle configuration file needs to contain initially the following lines.
buildscript {
    repositories {
        mavenCentral()
    }

    dependencies {
        classpath("org.springframework.boot:spring-boot-gradle-plugin:1.3.1.RELEASE")
    }
}

apply plugin: 'java'
apply plugin: 'spring-boot'
The second gradle configuration is called settings.gradle. This file contains only the project name. So create a new file called settings.gradle in your root folder.
$ vim settings.gradle
Afterwards you need to add the following line containing your project name. In our case my-vnfm.
rootProject.name = 'my-vnfm'
Afterwards go back to the root folder and run the following command to create automatically the gradle wrapper which is used for code management and compilation. For more information on how to use the gradle wrapper have a look at the gradle wrapper documentation here.
$ gradle wrapper
Once you did all these steps, the initial project structure is created. What we miss right now is the configuration of the gradle files to define and fetch dependencies we need for implementing the VNFManager. This is described in later sections.
Create the properties files
The properties files are used to define several parameters you need at runtime. So just create the following file structure by executing the following commands.
$ mkdir src/main/resources
Now you need to create two new files by running both commands you can find in the following
$ touch src/main/resources/application.properties
$ touch src/main/resources/conf.properties
What these files should contain is explained here.
Configure Gradle
Finally you need to extend your build.gradle for announcing the Main Class, plugins to apply and repositories to use. So open the build.gradle an add missing line so that the file contains the following line.
//...

bootRepackage {
    mainClass = 'org.openbaton.vnfm.MyVNFM'
}

//...
Take care about the configuration of the mainClass. If the name or package of your mainClass is different, you need to replace it here as well.
Property files
The previously created properties files are used to define several things. They are located in src/main/resources and are called application.properties and conf.properties.
The application.properties contains parameters for setting up all log levels. This file is useful for configuring the springframework (see Spring Boot configuration file). This file can contain the following lines.
vnfm.type=my-vnfm
vnfm.endpoint=my-vnfm-endpoint
vnfm.endpoint.type = RABBIT

logging.level.org.springframework=INFO
logging.level.org.hibernate=INFO
logging.level.org.apache=INFO
logging.level.org.jclouds=WARN
# logging.level.org.springframework.security=WARN
logging.level.org.springframework.web = WARN

# Level for loggers on classes inside the root package "org.project.openbaton" (and its
# sub-packages)
logging.level.org.openbaton=INFO

# Direct log to a log file
logging.file=/var/log/openbaton.log

vnfm.rabbitmq.brokerIp=localhost
vnfm.rabbitmq.management.port=15672
vnfm.rabbitmq.autodelete=true
vnfm.rabbitmq.durable=false
vnfm.rabbitmq.exclusive=false
vnfm.rabbitmq.minConcurrency=5
vnfm.rabbitmq.maxConcurrency=15

#########################################
############## RabbitMQ #################
#########################################

# Comma-separated list of addresses to which the client should connect to.
# spring.rabbitmq.addresses= 192.168.145.54
# Create an AmqpAdmin bean.
# spring.rabbitmq.dynamic=true
# RabbitMQ host.
spring.rabbitmq.host=${vnfm.rabbitmq.brokerIp}
# Acknowledge mode of container.
# spring.rabbitmq.listener.acknowledge-mode=
# Start the container automatically on startup.
# spring.rabbitmq.listener.auto-startup=true
# Minimum number of consumers.
spring.rabbitmq.listener.concurrency=5
# Maximum number of consumers.
spring.rabbitmq.listener.max-concurrency=30
# Number of messages to be handled in a single request. It should be greater than or equal to the transaction size (if used).
# spring.rabbitmq.listener.prefetch=
# Number of messages to be processed in a transaction. For best results it should be less than or equal to the prefetch count.
# spring.rabbitmq.listener.transaction-size=
# Login user to authenticate to the broker.
spring.rabbitmq.username=admin
# Login to authenticate against the broker.
spring.rabbitmq.password=openbaton
# RabbitMQ port.
spring.rabbitmq.port=5672
# Requested heartbeat timeout, in seconds; zero for none.
# spring.rabbitmq.requested-heartbeat=
# Enable SSL support.
# spring.rabbitmq.ssl.enabled=false
# Path to the key store that holds the SSL certificate.
# spring.rabbitmq.ssl.key-store=
# Password used to access the key store.
# spring.rabbitmq.ssl.key-store-password=
# Trust store that holds SSL certificates.
# spring.rabbitmq.ssl.trust-store=
# Password used to access the trust store.
# spring.rabbitmq.ssl.trust-store-password=
# Virtual host to use when connecting to the broker.
# spring.rabbitmq.virtual-host=
If you want to change log levels you need to adapt it here.
NOTE: If your VNFManager is running on a different machine than the rabbitmq broker, you need to change the vnfm.rabbit.brokerIp accordingly with the ip of the rabbitmq broker.
The conf.properties is also a very important configuration file. Here you need to define the type and endpoint of your VNFManager that is later used for registering on the NFVO. Furthermore, you can define your own parameters which can be used at runtime for whatever you want. So this file has to contain at least the type and endpoint. Additionally, it is defined the folder where the vim drivers are located. In this case the file should contain the following lines.
allocate = false
description=The VNFM able to handle all the VNFs that follow specific conventions, see http://openbaton.github.io/
enabled = true
endpoint-type = RABBIT
script-max-time = 300000
concurrency = 15


#### Additionally
vim-plugin-dir = ./plugins
Where the parameters mean:
| Params | Meaning |
|---|---|
| type | The type of VNF you are going to handle |
| endpoint | The endpoint used for requesting this VNFManager |
| description | Just a useless description |
| endpoint-type | type of the endpoint, either RABBIT or REST, depending on the sdk chosen. Check out next section |
| enabled | true if you want your vnfm to be enabled |
| allocate | true if the VNFM will ALLOCATE_RESOURCES, false if the NFVO will do |
| concurrency | The number of concurrent Receiver (only for vnfm-sdk-amqp) |
Choose a vnfm-sdk
Before you can start with the implementation you need to select the type of communication you want to use for the communication between the Orchestrator (NFVO) and the VNFManager. Either you can use the vnfm-sdk-amqp for using the RabbitMQ or the vnfm-sdk-rest for using the ReST interface. However, your choice doesn't effect the upcoming implementation, because the communication itself is done automatically in the background. But have in mind that both libraries depend on SpringBoot. So, if you want to avoid this dependency, a third option might be: just use the simple vnfm-sdk artifact. By using the simple vnfm-sdk you need to take care about all the communication between NFVO and VNFManager by yourself.
Once you have imported one of the vnfm-sdks you will have access to all the model classes and the vnfm-sdk classes needed to implement a VNFManager.
The following section shows you how to import the vnfm-sdk-amqp, representative for all the other opportunities.
Import a vnfm-sdk
This section shows how to import and configure your VNFManager to make use of the vnfm-sdk-amqp.
For gathering the vnfm-sdk-amqp library you need to import the libraries by adding the missing lines to your build.gradle:
//...

dependencies {
    compile 'org.hibernate:hibernate-core:4.3.10.Final'
    compile 'org.openbaton:vnfm-sdk-amqp:5.2.0'
}

//...
Note To make use of the vnfm-sdk-rest you need to change 'vnfm-sdk-amqp' to 'vnfm-sdk-rest' only.
So the final build.gradle file results like:
buildscript {
    repositories {
        mavenCentral()
    }
    dependencies {
        classpath("org.springframework.boot:spring-boot-gradle-plugin:1.3.1.RELEASE")
    }

}

apply plugin: 'java'
apply plugin: 'spring-boot'

repositories {
    mavenCentral()
    /**
     * Only needed for openbaton snapshots dependencies
     */
    maven {
        url 'https://oss.sonatype.org/content/repositories/snapshots/'
    }
}

dependencies {
    compile 'org.openbaton:vnfm-sdk-amqp:5.2.0'
    compile 'org.hibernate:hibernate-core:4.3.10.Final'
}

group 'your.group'
version '1.0-SNAPSHOT'

bootRepackage {
    mainClass = 'org.openbaton.vnfm.MyVNFM'
}
Once you did this, you need to trigger the gradle build process by running the following command via the command line in your project's root folder.
$ ./gradlew build
This will fetch all the dependencies defined in the build.gradle and gives you access to all the Classes you need. You can also do this by using the IDE by running the corresponding gradle task.
Implementation of the VNFManager
This section is going to describe the implementation of a basic VNFManager by using the vnfm-sdk-amqp. In the end, the VNFManager will be able to allocate and terminate resources by using its own openstack-plugin.
So first of all you need to define the main method used for starting your VNFManager. So add the following to your Main Class that it looks as follows:
package org.openbaton.vnfm;

import org.springframework.boot.SpringApplication;

public class MyVNFM {

    public static void main(String[] args){
        SpringApplication.run(MyVNFM.class);
    }
}
Afterwards you need to extend your Main Class (in this case MyVNFM) with the AbstractVnfmSpringAmqp.
The AbstractVnfmSpringAmqp takes care of all the configuration you need to register/unregister the VNFManager to the NFVO and handles incoming messages. Whereas the AbstractVnfm, extended by the AbstractVnfmSpringAmqp, is independent of the type of communication. This means more in detail that the AbstractVnfm processes the incoming messages and executes the right method depending on the defined Action inside the message. Moreover, it is responsible for loading predefined configuration files, setting up the VNFManager itself, creating the VNFR (based on the VNFD received in the first step) and doing essential parts like requesting the NFVO for granting operations or deciding who is responsible for allocate resources.
Once you extended your VNFMManger, you need to implement all the methods coming from the extension of AbstractVnfmSpringAmqp as shown below:
package org.openbaton.vnfm;

import org.openbaton.catalogue.mano.record.VNFCInstance;
import org.openbaton.catalogue.mano.record.VNFRecordDependency;
import org.openbaton.catalogue.mano.record.VirtualNetworkFunctionRecord;
import org.openbaton.catalogue.nfvo.Action;
import org.openbaton.catalogue.nfvo.VimInstance;
import org.openbaton.common.vnfm_sdk.amqp.AbstractVnfmSpringAmqp;
import org.springframework.boot.SpringApplication;
import org.springframework.boot.autoconfigure.SpringBootApplication;

import java.util.Collection;
import java.util.Map;

@SpringBootApplication
public class MyVNFM extends AbstractVnfmSpringAmqp{

    public static void main(String[] args){
        SpringApplication.run(MyVNFM.class);
    }

    /**
     * This operation allows creating a VNF instance.
     *
     * @param virtualNetworkFunctionRecord
     * @param scripts
     * @param vimInstances
     */
    @Override
    public VirtualNetworkFunctionRecord instantiate(VirtualNetworkFunctionRecord virtualNetworkFunctionRecord, Object scripts, Map<String, Collection<VimInstance>> vimInstances) throws Exception {
        return virtualNetworkFunctionRecord;
    }

    /**
     * This operation allows retrieving
     * VNF instance state and attributes.
     */
    @Override
    public void query() {

    }

    /**
     * This operation allows scaling
     * (out/in, up/down) a VNF instance.
     */
    @Override
    public VirtualNetworkFunctionRecord scale(Action scaleInOrOut, VirtualNetworkFunctionRecord virtualNetworkFunctionRecord, VNFComponent component, Object scripts, VNFRecordDependency dependency) throws Exception {
        return virtualNetworkFunctionRecord;
    }


    /**
     * This operation allows verifying if
     * the VNF instantiation is possible.
     */
    @Override
    public void checkInstantiationFeasibility() {

    }

    /**
     * This operation is called when one the VNFs fails
     */
    @Override
    public VirtualNetworkFunctionRecord heal(VirtualNetworkFunctionRecord virtualNetworkFunctionRecord, VNFCInstance component, String cause) throws Exception {
        return virtualNetworkFunctionRecord;
    }

    /**
     * This operation allows applying a minor/limited
     * software update (e.g. patch) to a VNF instance.
     */
    @Override
    public VirtualNetworkFunctionRecord updateSoftware(Script script, VirtualNetworkFunctionRecord virtualNetworkFunctionRecord) throws Exception {
        return virtualNetworkFunctionRecord;
    }


    /**
     * This operation allows making structural changes
     * (e.g. configuration, topology, behavior,
     * redundancy model) to a VNF instance.
     *
     * @param virtualNetworkFunctionRecord
     * @param dependency
     */
    @Override
    public VirtualNetworkFunctionRecord modify(VirtualNetworkFunctionRecord virtualNetworkFunctionRecord, VNFRecordDependency dependency) throws Exception {
        return virtualNetworkFunctionRecord;
    }

    /**
     * This operation allows deploying a new
     * software release to a VNF instance.
     */
    @Override
    public void upgradeSoftware() {

    }

    /**
     * This operation allows terminating gracefully
     * or forcefully a previously created VNF instance.
     *
     * @param virtualNetworkFunctionRecord
     */
    @Override
    public VirtualNetworkFunctionRecord terminate(VirtualNetworkFunctionRecord virtualNetworkFunctionRecord) {
        log.info("Terminating vnfr with id " + virtualNetworkFunctionRecord.getId());
        return virtualNetworkFunctionRecord;
    }

    @Override
    public void handleError(VirtualNetworkFunctionRecord virtualNetworkFunctionRecord) {

    }

    @Override
    protected void checkEMS(String hostname) {
        log.warn("EMS is not supported by this VNFM");
    }

    @Override
    protected void checkEmsStarted(String hostname) throws RuntimeException {
        log.warn("EMS is not supported by this VNFM");
    }

    @Override
    public VirtualNetworkFunctionRecord start(VirtualNetworkFunctionRecord virtualNetworkFunctionRecord) throws Exception {
        return virtualNetworkFunctionRecord;
    }

    @Override
    public VirtualNetworkFunctionRecord stop(VirtualNetworkFunctionRecord virtualNetworkFunctionRecord) throws Exception {
        return virtualNetworkFunctionRecord;
    }

    @Override
    public VirtualNetworkFunctionRecord startVNFCInstance(VirtualNetworkFunctionRecord virtualNetworkFunctionRecord, VNFCInstance vnfcInstance) throws Exception {
        return virtualNetworkFunctionRecord;
    }

    @Override
    public VirtualNetworkFunctionRecord stopVNFCInstance(VirtualNetworkFunctionRecord virtualNetworkFunctionRecord, VNFCInstance vnfcInstance) throws Exception {
        return virtualNetworkFunctionRecord;
    }

    @Override
    public VirtualNetworkFunctionRecord configure(VirtualNetworkFunctionRecord virtualNetworkFunctionRecord) throws Exception {
        return virtualNetworkFunctionRecord;
    }

    @Override
    public VirtualNetworkFunctionRecord resume(VirtualNetworkFunctionRecord virtualNetworkFunctionRecord, VNFCInstance vnfcInstance, VNFRecordDependency dependency) throws Exception {
        return virtualNetworkFunctionRecord;
    }

    /**
     * This operation allows providing notifications on state changes
     * of a VNF instance, related to the VNF Lifecycle.
     */
    @Override
    public void NotifyChange() {

    }
}
Now you can implement whatever you want. If the VirtualNetworkFunctionRecord is returned, it will go back directly to the NFVO.
One of the methods that can be overwritten is the fillParameters. This method is important when you have specified some "provides" in your VNFD, in fact you can fill them in this method and make them available afterwards to the scripts (see How to use the parameters).
An example of allocating and terminating resource by using a plugin can be found here and here.
Note If you use vnfm-sdk-amqp or vnfm-sdk-rest the VNFManager main class needs to be stateless since it can (will) run each method potentially in parallel. For what concerns vnfm-sdk-amqp, even setting concurrency to 1, will not ensure to have always the same instance of the class.
Using the VnfmHelper
Additionally you can autowire the VnfmHelper to make use of several helper methods that are very useful. In this case your VNFManager should look like this:
package org.openbaton.vnfm;

import org.springframework.beans.factory.annotation.Autowired;

public class MyVNFM extends AbstractVnfmSpringAmqp {

    @Autowired
    private VnfmHelper vnfmHelper;

    [...]
}
The vnfmHelper helps with some methods out of the box:
package org.openbaton.common.vnfm_sdk;

import org.openbaton.catalogue.nfvo.messages.Interfaces.NFVMessage;

public abstract class VnfmHelper {

    /**
     * This operation sends a NFVMessage
     * to the NFVO and doesn't wait for answer.
     * @param nfvMessage
     */
    public abstract void sendToNfvo(NFVMessage nfvMessage);

    /**
     * This operation send a NFVMessage
     * to the NFVO and waits for the answer.
     * @param nfvMessage
     */
    public abstract NFVMessage sendAndReceive(NFVMessage nfvMessage) throws Exception;
}
At the moment, the main purpose of the VnfmHelper is to send messages to the NFVO and wait for the answer if needed.
Note This class needs to be implemented in case you want to use only the vnfm-sdk and must be provided to the AbstractVnfm.
Using plugins
This section describes the initialization and usage of plugins. Therefore, you need to do several things:
- Start the plugins
- Connect an according VIM to the plugin or use the plugin directly
Note If you want to use the Vim with plugins, you need to fetch also the interfaces and VIM implementations by adding the following lines to your build.gradle dependencies
compile 'org.openbaton:vim-int:5.2.0'
compile 'org.openbaton:vim-impl:5.2.0'
compile 'org.openbaton:sdk:5.2.0'
After that you need to rebuild your project for fetching the dependencies automatically.
Now you can use the ResourceManagement interface. In the end it should look like the following:
package org.openbaton.vnfm;

import org.openbaton.catalogue.mano.record.VNFCInstance;
import org.openbaton.catalogue.mano.record.VNFRecordDependency;
import org.openbaton.catalogue.mano.record.VirtualNetworkFunctionRecord;
import org.openbaton.catalogue.nfvo.Action;
import org.openbaton.catalogue.nfvo.VimInstance;
import org.openbaton.common.vnfm_sdk.amqp.AbstractVnfmSpringAmqp;
import org.openbaton.nfvo.vim_interfaces.resource_management.ResourceManagement;
import org.openbaton.plugin.utils.PluginStartup;
import org.openbaton.plugin.utils.RabbitPluginBroker;
import org.openbaton.vim.drivers.VimDriverCaller;
import org.springframework.beans.factory.annotation.Autowired;
import org.springframework.boot.SpringApplication;
import org.springframework.boot.autoconfigure.SpringBootApplication;
import org.springframework.context.ConfigurableApplicationContext;

import java.io.IOException;
import java.util.Collection;
import java.util.Map;

public class MyVNFM extends AbstractVnfmSpringAmqp {

    @Autowired
    private ConfigurableApplicationContext context;

    private ResourceManagement resourceManagement;

    private VimDriverCaller client;

    [...]

    @Override
    protected void setup() {
        super.setup();
        try {
            //Start all the plugins that are located in ./plugins
            PluginStartup.startPluginRecursive("./plugins", true, "localhost", "5672", 15, "admin", "openbaton", "15672");
        } catch (IOException e) {
            e.printStackTrace();
        }
        //Fetching the OpenstackVim using the openstack-plugin
        resourceManagement = (ResourceManagement) context.getBean("openstackVIM", 19345, "15672");
        //Using the openstack-plugin directly
        client = (VimDriverCaller) ((RabbitPluginBroker) context.getBean("rabbitPluginBroker")).getVimDriverCaller("localhost", "admin", "openbaton", 5672, "openstack", "openstack", "15672");
    }
}
This code expects that the plugins are located in ./plugins. So just copy the openstack plugin of your choice to this path. Now you are able to use a VIM inside or the directly the plugin in your VNFManager to allocate and release resources whenever you want.
Allocate Resources
The following code snippet shows how to instantiate (allocate) resources at VNFManager side with the help of the VIM.
/**
 * This operation allows creating a VNF instance.
 *
 * @param virtualNetworkFunctionRecord
 * @param scripts
 * @param vimInstances
 */
@Override
public VirtualNetworkFunctionRecord instantiate(VirtualNetworkFunctionRecord virtualNetworkFunctionRecord, Object scripts, Map<String, Collection<VimInstance>> vimInstances) throws Exception {
    log.debug("Processing allocation of Resources for vnfr: " + virtualNetworkFunctionRecord);
    /**
     * Allocation of Resources
     *  the grant operation is already done before this method
     */
    String userdata = "";
    Iterator<ConfigurationParameter> configIterator = virtualNetworkFunctionRecord.getConfigurations().getConfigurationParameters().iterator();
    while (configIterator.hasNext()) {
        ConfigurationParameter configurationParameter = configIterator.next();
        log.debug("Configuration Parameter: " + configurationParameter);
        if (configurationParameter.getConfKey().equals("GROUP_NAME")) {
            userdata = "export GROUP_NAME=" + configurationParameter.getValue() + "\n";
            userdata += "echo $GROUP_NAME > /home/ubuntu/group_name.txt\n";
        }
    }
    userdata += getUserData();

    log.debug("Processing allocation of Recources for vnfr: " + virtualNetworkFunctionRecord);
    for (VirtualDeploymentUnit vdu : virtualNetworkFunctionRecord.getVdu()) {
        VimInstance vimInstance = vimInstances.get(vdu.getParent_vdu()).iterator().next();
        log.debug("Creating " + vdu.getVnfc().size() + " VMs");
        for (VNFComponent vnfComponent : vdu.getVnfc()) {
            Map<String, String> floatingIps = new HashMap<>();
            for (VNFDConnectionPoint connectionPoint : vnfComponent.getConnection_point()) {
                if (connectionPoint.getFloatingIp() != null && !connectionPoint.getFloatingIp().equals("")) {
                    floatingIps.put(connectionPoint.getVirtual_link_reference(), connectionPoint.getFloatingIp());
                }
            }
            try {
                VNFCInstance vnfcInstance = resourceManagement.allocate(vimInstance, vdu, virtualNetworkFunctionRecord, vnfComponent, userdata, floatingIps, new HashSet<>()).get();
                log.debug("Created VNFCInstance with id: " + vnfcInstance);
                vdu.getVnfc_instance().add(vnfcInstance);
            } catch (VimException e) {
                log.error(e.getMessage());
                if (log.isDebugEnabled())
                    log.error(e.getMessage(), e);
            }
        }
    }
    log.debug("Allocated all Resources for vnfr: " + virtualNetworkFunctionRecord);
    return virtualNetworkFunctionRecord;
}
Note Keep in mind that you need to set allocate to false in conf.properties, if you want to allocate resources on the VNFManager side. Otherwise the NFVO will allocate resources as well.
Release Resources
The next code snippet shows an implementation of the terminate method used for releasing resources at VNFManager side.
/**
 * This operation allows terminating gracefully
 * or forcefully a previously created VNF instance.
 *
 * @param virtualNetworkFunctionRecord
 */
@Override
public VirtualNetworkFunctionRecord terminate(VirtualNetworkFunctionRecord virtualNetworkFunctionRecord) {
    log.info("Terminating vnfr with id " + virtualNetworkFunctionRecord.getId());
    NFVORequestor nfvoRequestor = new NFVORequestor("admin", "openbaton", "localhost", "8080", "1");
    for (VirtualDeploymentUnit vdu : virtualNetworkFunctionRecord.getVdu()) {
        Set<VNFCInstance> vnfciToRem = new HashSet<>();
        List<VimInstance> vimInstances = new ArrayList<>();
        VimInstance vimInstance = null;
        try {
            vimInstances = nfvoRequestor.getVimInstanceAgent().findAll();
        } catch (SDKException e) {
            log.error(e.getMessage(), e);
        } catch (ClassNotFoundException e) {
            log.error(e.getMessage(), e);
        }
        for (VimInstance vimInstanceFind : vimInstances) {
            if (vdu.getVimInstanceName().contains(vimInstanceFind.getName())) {
                vimInstance = vimInstanceFind;
                break;
            }
        }
        for (VNFCInstance vnfcInstance : vdu.getVnfc_instance()) {
            log.debug("Releasing resources for vdu with id " + vdu.getId());
            try {
                resourceManagement.release(vnfcInstance, vimInstance);
            } catch (VimException e) {
                log.error(e.getMessage(), e);
                throw new RuntimeException(e.getMessage(), e);
            }
            vnfciToRem.add(vnfcInstance);
            log.debug("Released resources for vdu with id " + vdu.getId());
        }
        vdu.getVnfc_instance().removeAll(vnfciToRem);
    }
    log.info("Terminated vnfr with id " + virtualNetworkFunctionRecord.getId());
    return virtualNetworkFunctionRecord;
}
Start the VNFManager
Once you finalized your VNFManager you can compile and start it with the following commands.
$ ./gradlew clean build
$ java -jar build/libs/my-vnfm-{version}.jar
If everything is fine, your VNFManager will register to NFVO and is able now to receive requests and process them.